JSP/IntelliJ - 환경 구축 (2) 프로젝트 생성 및 Tomcat 연동
less than 1 minute read
Intellij 프로젝트 생성 및 Tomcat 연동
1 Intellij Ultimate 설치
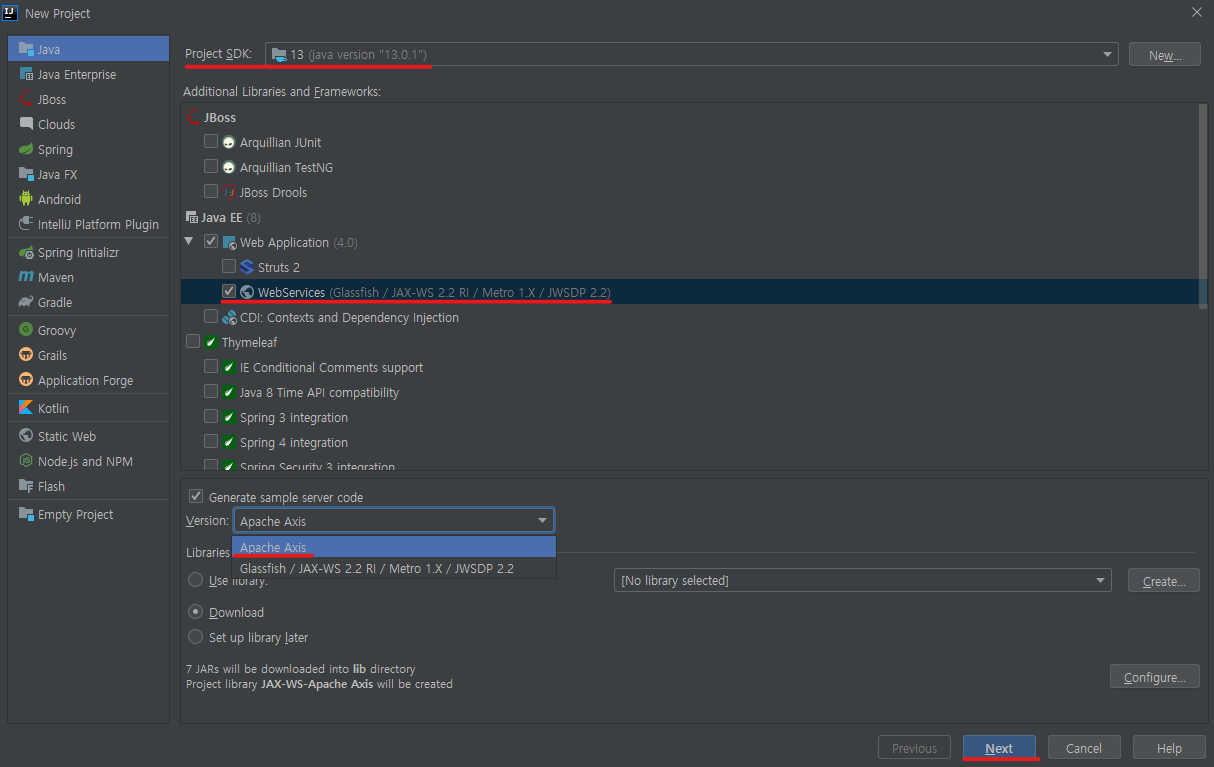
2 프로젝트 생성
-
Project 설정
-
Java SDK 버전 설정
-
Web Application -> WebServices 선택
-
Version -> Apache Axis 선택
-
Next -> 프로젝트 이름 입력 -> Finish
2 Tomcat - IntelliJ 연동
-
Tomcat 연동
-
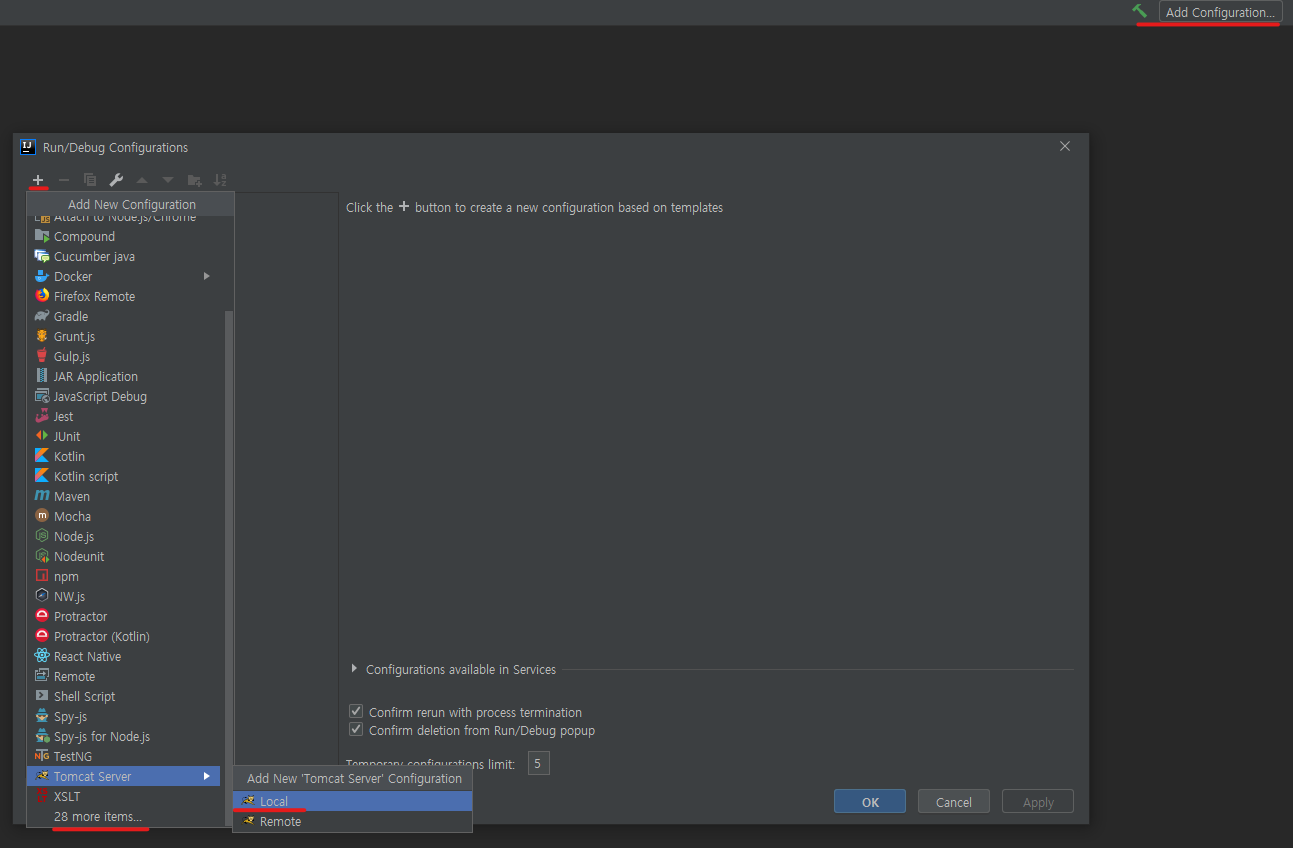
Tomcat 추가
-
오른쪽 위에 Add Configurations 클릭
-
Add New Configuration (+) 클릭
-
Tomcat Server -> Local 선택
-
Tomcat Server가 안보이면 more items… 클릭하면 아래쪽에 있음
-
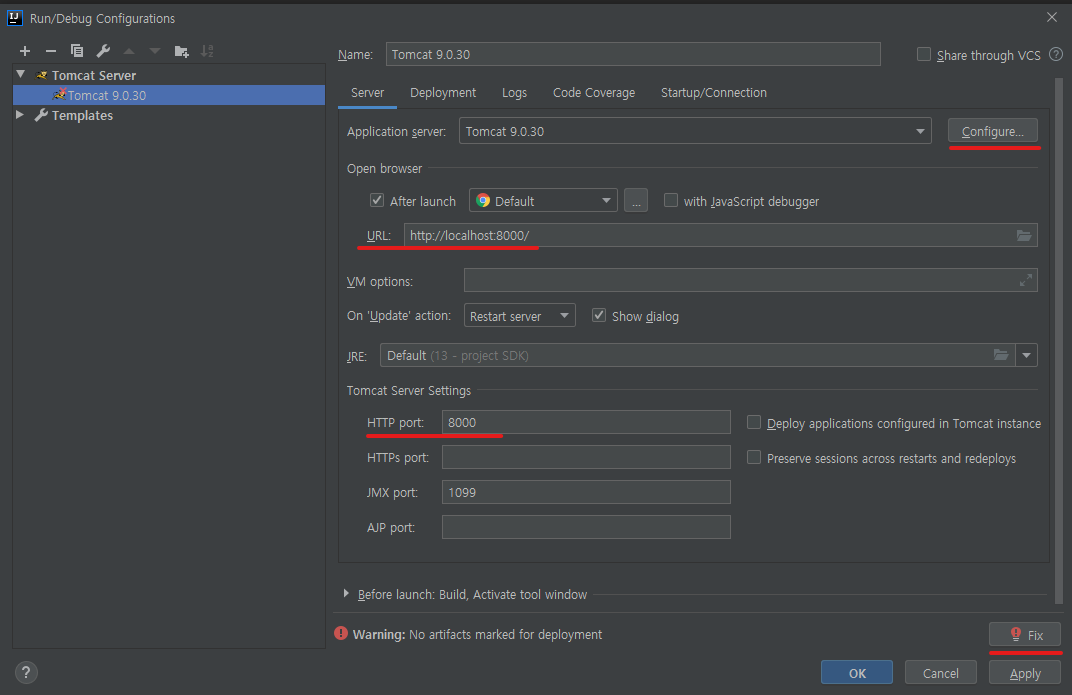
Tomcat 설정
-
-
URL이나 HTTP port로 port번호 변경 가능(db port 번호와 겹치기 때문에 변경)
-
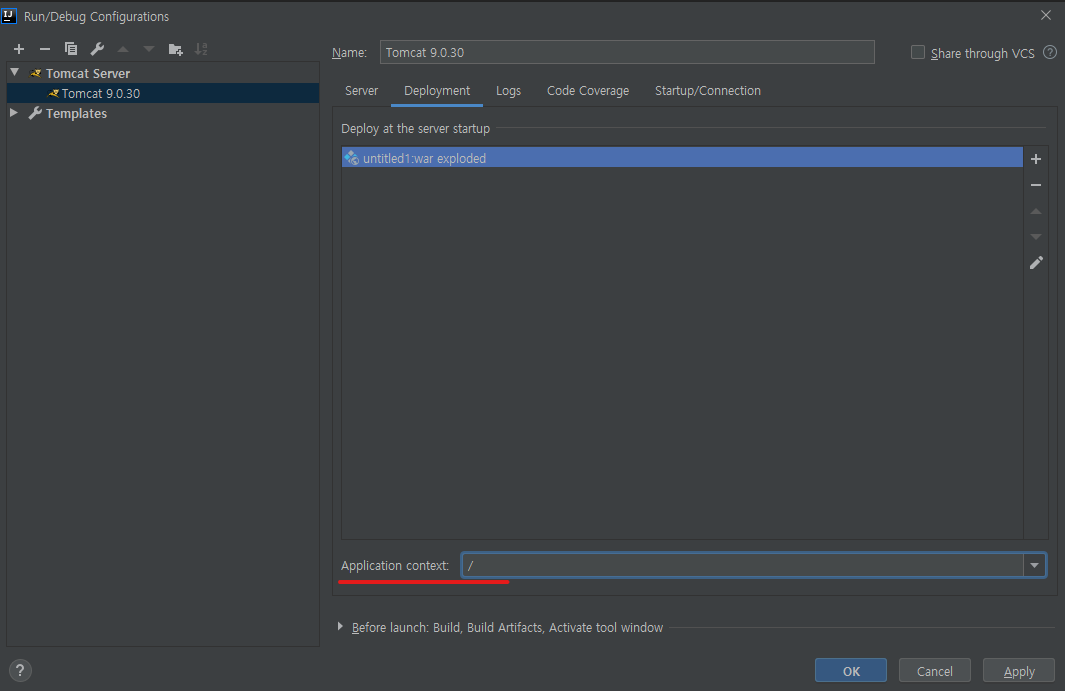
fix 클릭
-
Application context -> / 로 수정 -> OK
3 IntelliJ에서 Tomcat 실행
-
오른쪽 위에 Run or Shift + F10 으로 실행

Leave a comment