Intellij JSP - MySQL 연동
MySQL 연동
-
MySQL 설치
-
Intellij - MySQL 연동
-
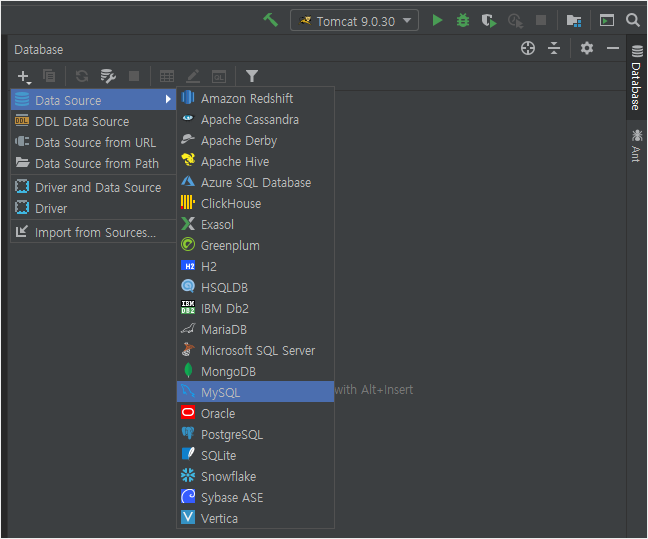
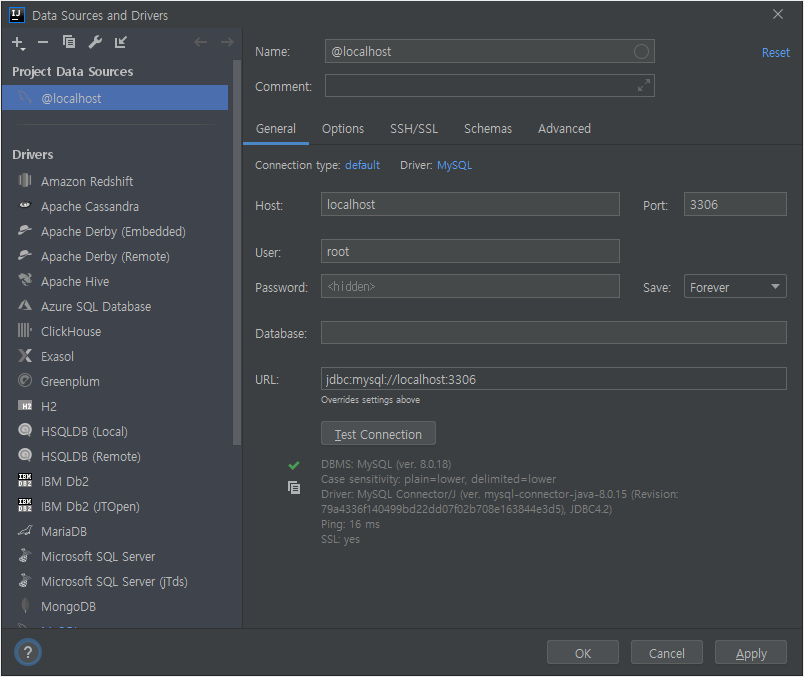
오른쪽에 Database -> New -> Data Source -> MySQL 선택
-
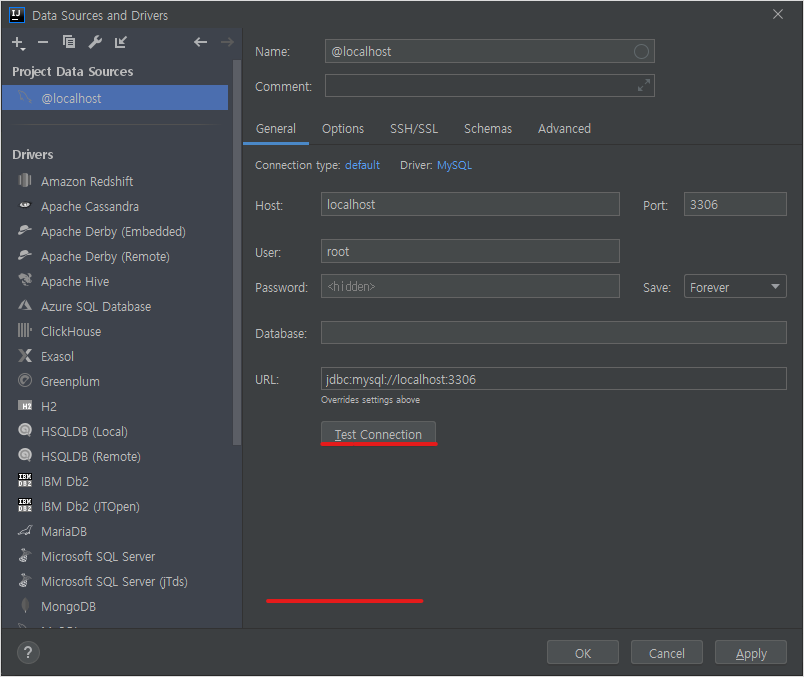
아래쪽에 Download버튼이 생기면 클릭해서 다운로드 받은 후 Test Connection 클릭
-
아이디와 비밀번호를 입력하고 OK (기본적으로 User = root / Password는 생성시 비밀번호)

-
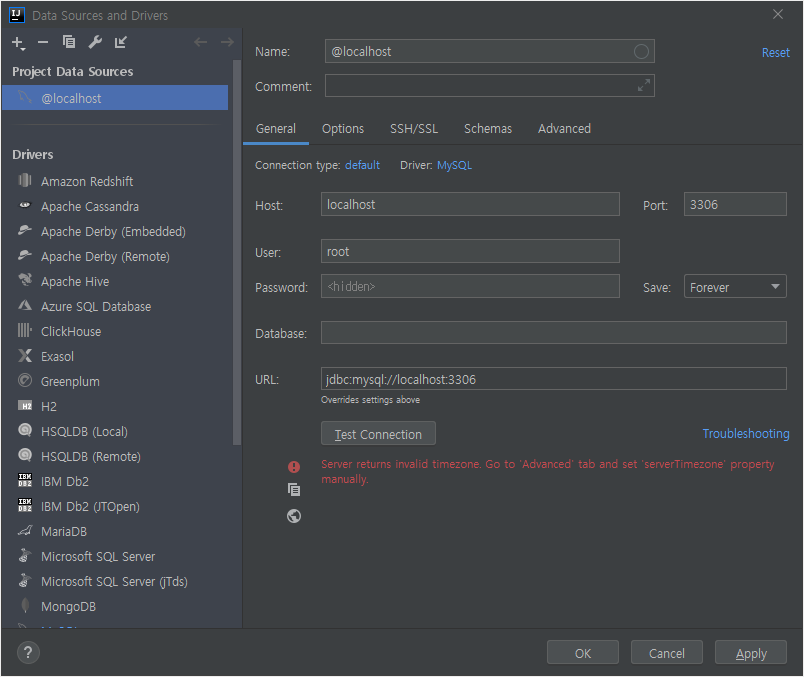
아래 처럼 serverTimezone 에러가 뜨면
-
Advanced ->serverTimezone의 Value에
UTC추가 후 다시 Test Connection을 누른다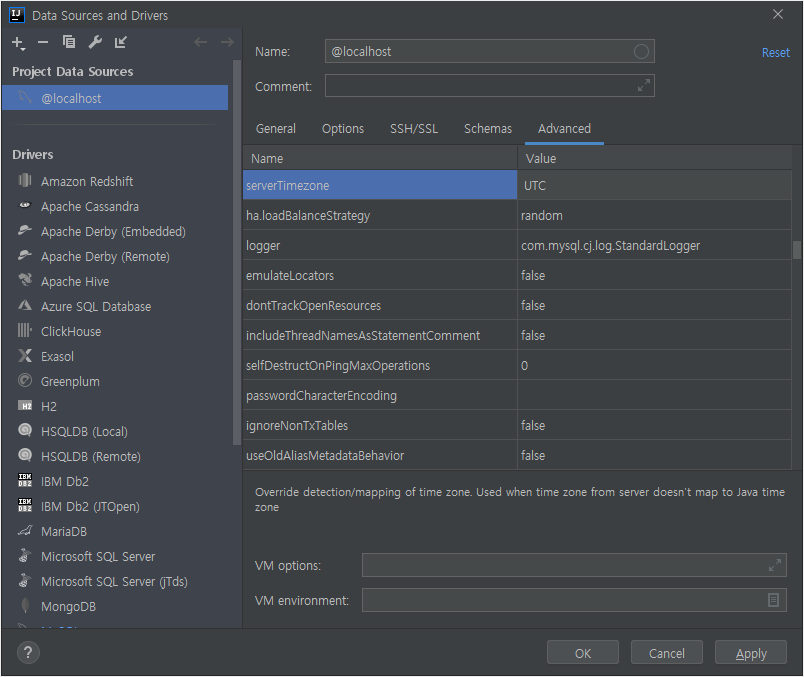
-
Test Connection이 정상 작동하면 OK
-
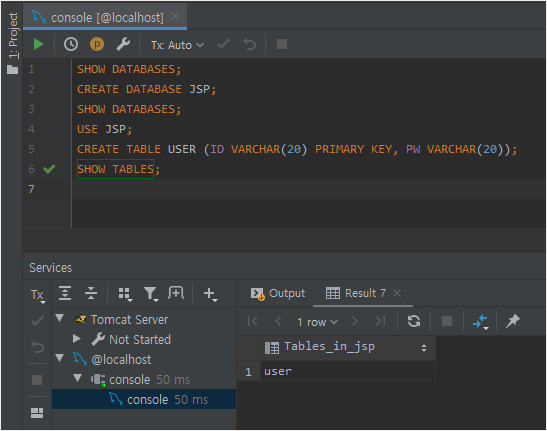
Intellij가 MySQL console 창과 연동된것을 볼수 있다
-
-
MySQL JDBC 추가
-
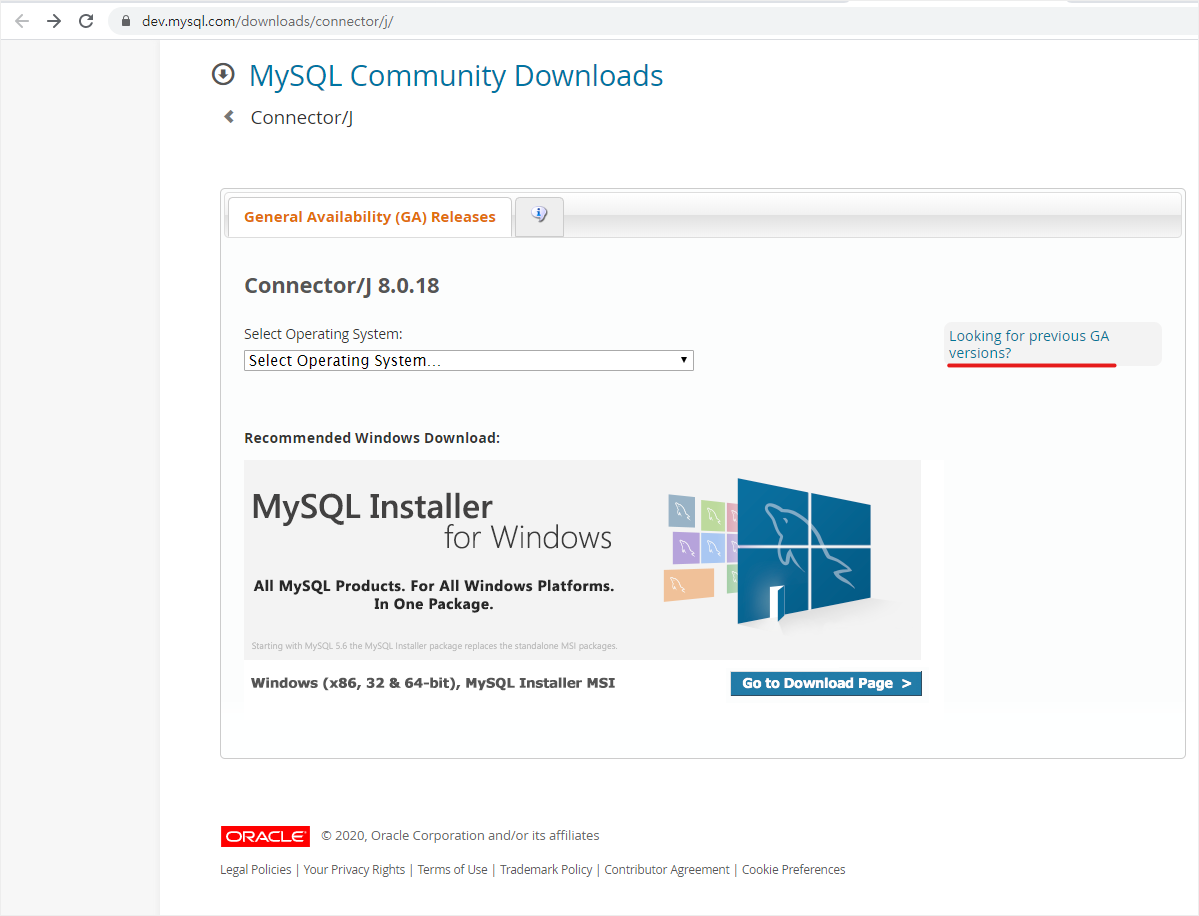
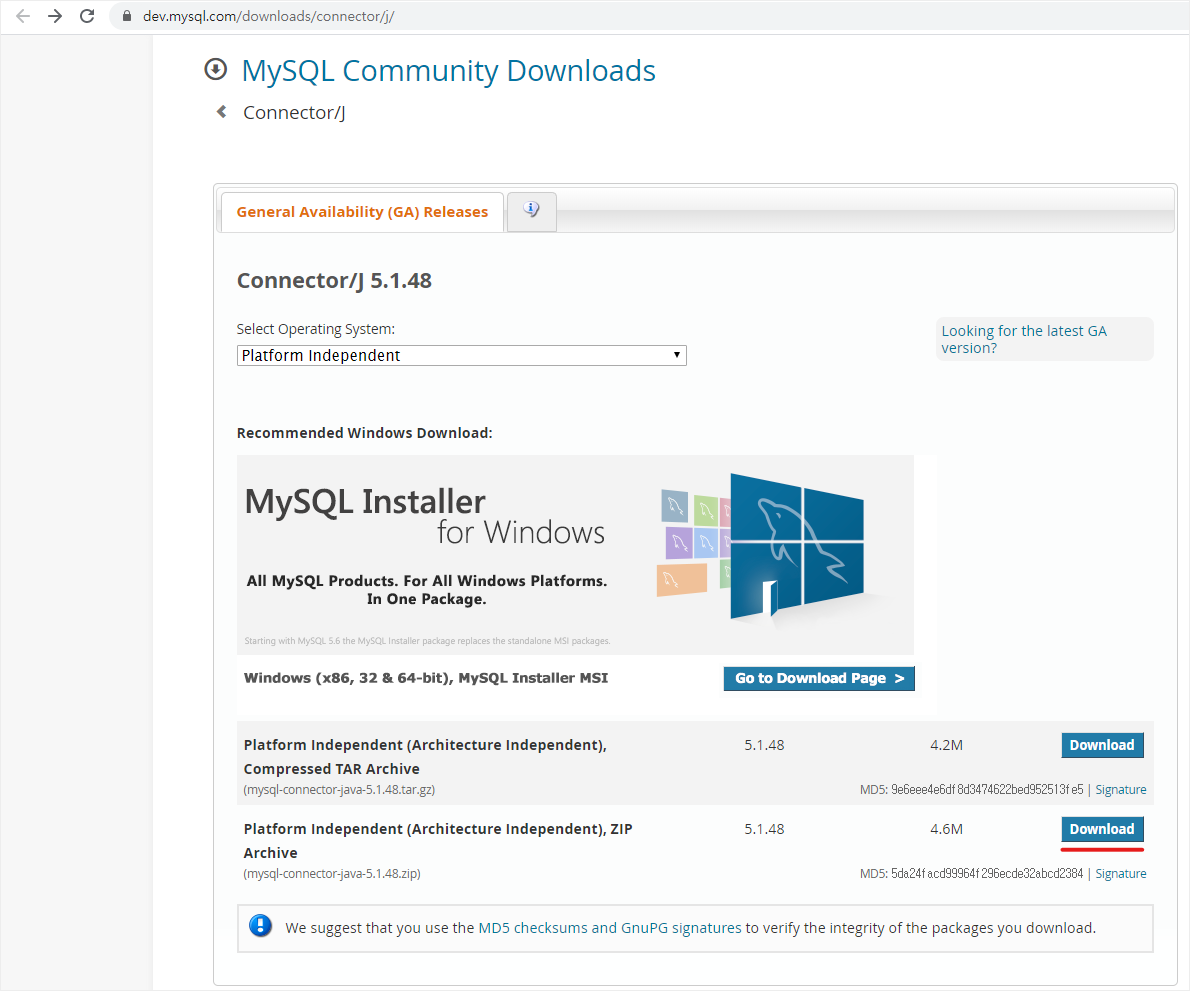
MySQL Community Downloads 에서 MySQL JDBC를 다운 받고 압축을 푼다
-
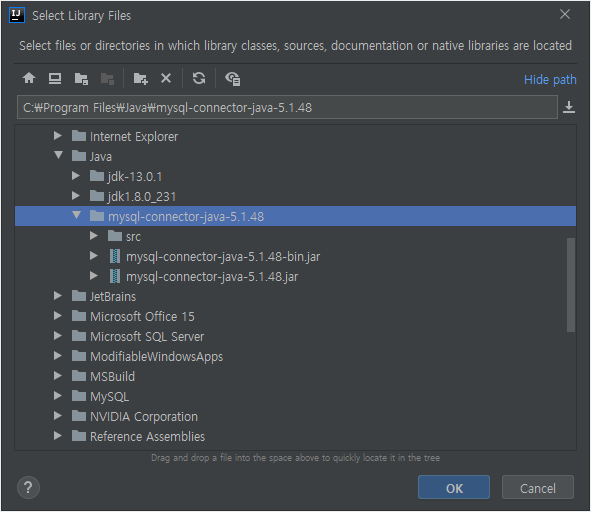
Project Structure (Ctrl + Alt + Shift + S) -> Libraries -> New Project Library -> Java

-
압축을 풀은 폴더에 있는 mysql-connector-java-5.1.48-bin.jar를 추가후 OK
-
-
간단한 Insert 예제
-
DBConnUtils.java
package db; import java.sql.Connection; import java.sql.DriverManager; public class DBConnUtils { public static Connection getConnection(){ try{ String dbURL = "jdbc:mysql://localhost:3306/JSP"; String dbID = "root"; String dbPW = "1234"; Class.forName("com.mysql.jdbc.Driver"); return DriverManager.getConnection(dbURL,dbID,dbPW); } catch (Exception e) { e.printStackTrace(); } return null; } } -
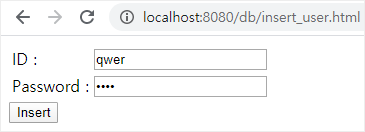
insert_user.html
<!DOCTYPE html> <html lang="en"> <head> <meta charset="UTF-8"> <title>Insert User</title> </head> <body> <form action="insert_user.jsp" method="post"> <table> <tr> <td>ID :</td> <td><input type="test" name="id"></td> </tr> <tr> <td>Password :</td> <td><input type="password" name="pw"></td> </tr> </table> <input type="submit" value="Insert"> </form> </body> </html> -
insert_user.jsp
<%@ page import="db.DBConnUtils" %> <%@ page import="java.sql.Connection" %> <%@ page import="java.sql.PreparedStatement" %> <%@ page import="java.sql.SQLException" %> <%@ page contentType="text/html;charset=UTF-8" language="java" %> <% Connection conn = DBConnUtils.getConnection(); PreparedStatement pstmt = null; String query = "INSERT INTO USER VALUES (?,?)"; if (conn != null) { try { pstmt = conn.prepareStatement(query); pstmt.setString(1, request.getParameter("id")); pstmt.setString(2, request.getParameter("pw")); pstmt.executeUpdate(); conn.close(); pstmt.close(); %> <script> alert("Insert 성공"); location.href='insert_user.html'; </script> <% } catch (SQLException e) { e.printStackTrace(); } } else { %> <script> alert("Database 연결 실패"); history.back(); </script> <% } %> -
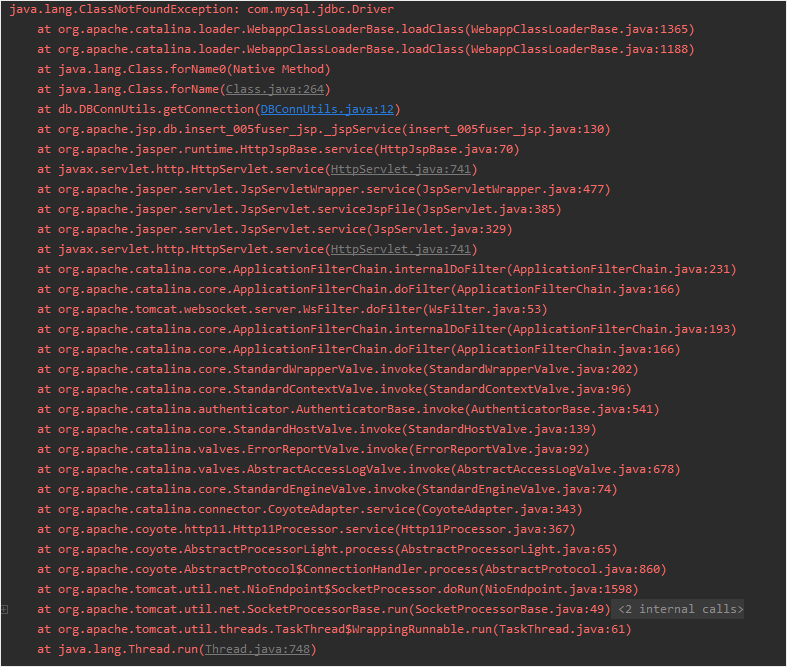
ClassNotFoundExecption: com.mysql.jdbc.Driver 에러가 뜰 경우
-
JDBC 드라이버 파일을 아래의 위치 중 한군데에 복사
-
JRE의 library 디렉토리
C:\Program Files\Java\jdk1.8.0_231\jre\lib\ext
-
Tomcat의 library 디렉토리
C:\apache-tomcat-9.0.30\lib
-
-
insert_user.html
-
insert_user.jsp

-
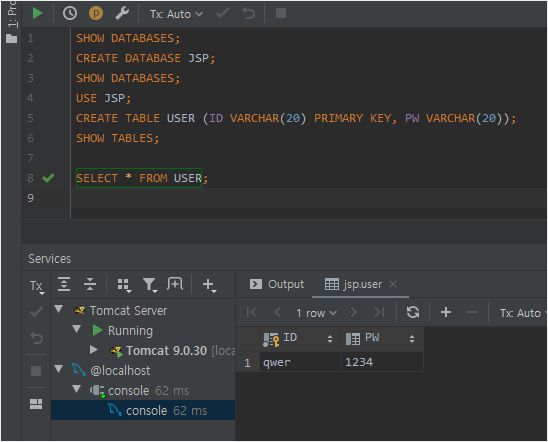
정상적으로 Insert된 것을 확인할 수 있다
-
-
Servlet을 포함한 JSP 2.1 웹 프로그래밍 입문에서 완성까지
-
Server returns invalid timezone
-
Tomcat에서 JDBC driver 설정
Leave a comment